That is the question!
Put simply, it is artwork that we can print from without having to do any alterations or preparation.
A common example of a print ready file is a ‘PDF’. which has a ‘.pdf’ extension at the end of the file name. PDFs (Portable Document Format) were originally developed by Adobe in 1991 and are also know as Acrobat files. They are ‘self contained’ documents that can hold all the necessary elements including text, fonts, graphics and images, together with the printing options that are needed by a commercial printing service such as EazyPrint. Currently these are by far the most popular file type and, if prepared correctly, can be the simplest to work with.
Other acceptable print ready files may include:
Adobe Illustrator Adobe Photoshop Adobe Indesign Quark Xpress EPS


TIFF JPEG
But its not only the type of file that makes it print ready, it’s how you have prepared it…
In all cases it is best, if possible, to produce your artwork at the actual size that you want it printed. Occasionally, if the size is beyond the limits of the application being used, then it is acceptable to scale it down in proportion to half size or quarter size. However, this is usually only required when printing very large items such as banners or display boards.
If this is the case, is important to make a note of that on the file or somewhere on your purchase order as it would have to be manually blown up to the correct size on the RIP which is controlling the output of the file.
a lot of problems can be caused by missing fonts: either that they have not been embedded or not supplied. It is important to embed or supply the fonts in your documents, most design and desktop publishing applications will have an option for this in some form or another. Take a look at our fonts guide for information on how to embed your font choice.

If your design has images or graphics that go right to the edge,
it is important to add bleed to it, usually 3mm is standard but more is ok, bleed is where an image or graphic extends off the artboard or page of the application, the reason for this is so when it is trimmed it reduces the possibility of any white lines showing on the edge of the finished product.
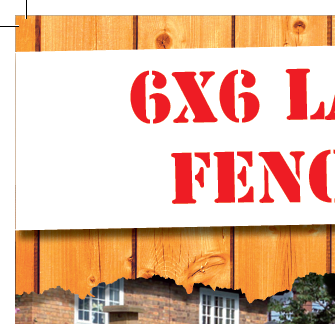
here is an example of bleed,
the image extends past the trim marks
to eliminate white lines
on the edge when trimmed.
Take a look at our bleed guide for more information.
Raster images are files which are made up of ‘pixels’, like digital photos. The preparation of these images can sometimes be confusing to customers who are not professionals but like to do their own artwork. This is because there are many different file formats which are used for various applications in industries such as Digital Photography, Web Design etc.
The most common image formats for printing are TIFF files which have a ‘.tif’ extension and JPEG files which have ‘.jpg’ or ‘.jpeg’ as the extension. These should be in CMYK (cyan, magenta, yellow, black) colour format. Any good image editing software will have the ability to change the colour format of a picture. In most cases digital cameras and scanners will save images as RGB (red, green, blue) which is the natural colour format for displaying pictures on the screen of your computer, so these will need to be changed or the colour of your design will NOT print as you expect! Advancing technologies mean that newer RIPs can process RBG images quite well and get reasonably close to the intended colour. That said, it is still good practice to ensure your images are all CMYK to avoid any nasty surprises when your banner or brochure is delivered.
Resolution of images is another important factor, as a rule of thumb, images used for printing should have a minimum resolution of 300dpi when they are at the actual printed size, if you have dragged an image from a website it would most likely be too low in resolution to print from unless you were scaling it down quite small, that is because web images are usually around 72dpi. Take a look at our resolution guide for more information.
Image resolution is a bit more flexible when it comes to large format printing, even though the final printed size is bigger, usually you are standing further away from it and the print quality for most display printers is a bit grainier than photo quality printers or litho printing, for this reason you can often get away with lower resolution files. it is quite common to have large format files saved at half the resolution (150dpi) or half the size of the final print.
When using applications such as Adobe Indesign or Quark Xpress, any images used in the document should be supplied with the main file as these are linked to the file and not stored within it, most DTP software packages will have some kind of packaging feature which collects all your fonts images into one place for you to send to a commercial printing service, Quark Xpress has the ‘Collect for Output’ option in the file menu and Adobe Indesign uses an option simply called ‘Package’.

These packaging options are great if you are using images and fonts from different source folders.
The steps I have outlined here are general guidelines that are necessary to produce good quality print ready artwork, delays and errors caused by incorrectly prepared files can be costly! Actual requirements may vary slightly according to the printer or commercial service you choose, in which case they may be even more specific in their needs.
If you have any questions regarding preparation of artwork please contact us and one of our team will be happy to help.
Written by Joanne Serellis